Notes to Self: Configuring New Linux (Ubuntu) Installations for Your Workflow
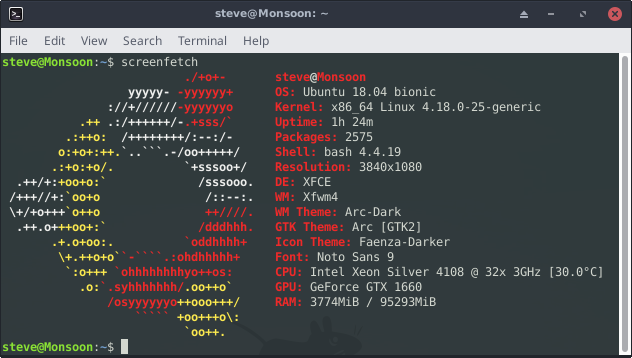
- screenfetch of the new rig/post-tenure gift to myself
I’ve been a dedicated Linux user since 2005 and made the final switch from Stata to R for statistical analyses in 2012. There are always some configuration issues involved in getting a setup with which I’m comfortable, but I ultimately find it. However, this becomes a bit of a headache when I get a new computer and have to figure out how exactly I did what I did.
Consider this mostly a note to myself on tailoring a Linux installation (preferred: Ubuntu and its derivatives like Linux Mint) to my preferred workflow. Others may find it useful but this is mostly for an audience of one (i.e. me) so that I can remember what I did the next time I have to install a brand new Linux distribution.
- Install These Packages Before Installing R
- Getting Stan to Run on Ubuntu With Your Makevars File
- Alternate Between Microsoft R Open and Vanilla R
- Make Underscored Directories Come First in Case-Insensitive Directory Listing
Install These Packages Before Installing R
Linux users, unlike Mac or Windows users, will need to install some other packages from the package repository in (Ubuntu) Linux before several R packages will work. Basically, make sure to install these packages in the command line before trying to do anything in R.
sudo apt install curl libcurl4 libssl-dev libxml2-dev libcurl4-openssl-dev libgit2-dev libssl cmake libfontconfig1-dev libharfbuzz-dev libfribidi-dev libfreetype6-dev libpng-dev libtiff5-dev libjpeg-dev
You’ll need curl for R Open, which I used to use before version 4.0 of R. libssl-dev and libxml2-dev are required for the {openssl} and {xml2} packages in R, which are required packages for {tidyverse}. libcurl4-openssl-dev is required for {RCurl}, which {brms} requires for statistical modeling in Stan. You’ll need need libgit2-dev for the {git2r} package in R, the extent to which {git2r} is required for the devtools package. {nloptr} depends on cmake. {kableExtra} requires {systemfonts}, which in turn requires libfontconfig1-dev on Ubuntu. {pkgdown} has a similar intermediate requirement. It requires {textshaping}, which in turn requires libharfbuzz-dev and libfribidi-dev. It also requires {ragg}, which needs libfreetype6-dev, libpng-dev, libtiff5-dev, and libjpeg-dev. Thinking ahead, you’ll need libssl for installing Rstudio as well.
Install these packages before installing R or trying to install your favorite packages in R and you’ll ensure there are no package installation problems. I will probably revisit this and update it when I find another Linux package required for another R package.
Getting Stan to Run on Ubuntu With Your Makevars File
I forget why this keeps happening but a Stan model won’t compile in R out the box. There will be an error that reads something like “C++14 standard requested but CXX14 is not defined”, but the fix requires just one line of code. Create a blank document and copy-paste the following into it.
CXX14 = g++ -std=c++1y -Wno-unused-variable -Wno-unused-function -fPIC
Save that file as Makevars and drop it into a .R folder in the home directory. Restart R/Rstudio if necessary but that should do it.
Alternate Between Microsoft R Open and Vanilla R
I’ll occasionally alternate between Microsoft R Open (my default R) and vanilla R that I installed from the official R repository for Ubuntu. However, they install in different locations. Microsoft R Open installs to /usr/bin/R while vanilla R installs to a more convoluted directory of /usr/lib/R/bin/R. This arrangement means Microsoft R Open is the default R given its location in /usr/bin/R. It’ll be the first command found when scanning the /usr directory.
This too is an easy thing to change. Open the .bashrc file in the home directory or, better yet, the .bash_aliases file in the home directory if there is one. Enter the following line for when you want vanilla R in lieu of Microsoft R Open.
alias R='/usr/lib/R/bin/R'
This change will appear when you call R in the terminal. However, Rstudio will still want to point to Microsoft R Open. To get Rstudio to point to vanilla R, add the following line to the .profile file (again in the home directory).
export RSTUDIO_WHICH_R='/usr/lib/R/bin/R'
Logging out and logging back in should be sufficient to finalize these changes. Undoing these is as simple as commenting out those lines in the respective files and logging out/in again.
Make Underscored Directories Come First in Case-Insensitive Directory Listing
Clemson University bought me a new laptop (Lenovo Thinkpad P52s) this summer. It was one of those situations where the university stipulated 1) I must get a new laptop because the money is allocated for this and no other purpose even if it is not a purchase I wanted or expected (kind of like this situation) and 2) it must not cost more than $2,000. I’m normally a Macbook user, so this priced me out of a Macbook Pro. Truth is, though, I’m not sure I even wanted another Macbook anyway because the newer models look completely unappealing for the price tag. So, after our college’s IT guy had a falling out trying to communicate with Dell, I got a new Lenovo Thinkpad P52s.
Unrelated to that aside, Mac’s Finder (i.e. its file manager application) defaults to putting underscore directories first before a case-insensitive alphanumeric sort. I like that default a lot. Jekyll users will recognize that underscored directories coincide with important directories that contain site content. I’ve started to extend that logic to my R projects, creating directories for _cache (code chunks) and _figs (document figures) that I keep elevated in a list view in my file manager. However, that option is nowhere a default in the various system locales on Linux. LC_COLLATE=C will list underscored directories first before directories that start with a number or letter, but it is a case-sensitive setting that elevates uppercase directories above lowercase directories. That might work for some people, but it would make my sprawling Dropbox directory unnavigable.
The good news is there’s a simple way to do this that leans on the default (American) locale of en_US.utf8. It requires a few sudo commands and edits in a text editor.
cd /usr/share/i18n/locales
sudo cp en_US en_US_edited # make a copy of en_US
sudo cp iso14651_t1 iso14651_t1_edited # make a copy of iso14651_t1
sudo cp iso14651_t1_common iso14651_t1_common_edited # make a copy of iso14651_t1_common
Next, open en_US_edited in a text editor (e.g. sudo gedit en_US_edited, if you’re in the directory) and find the line where you see copy "iso14651_t1". Change that to copy "iso14651_t1_edited" and save the file.
Then, open iso14651_t1_edited as you did before with a sudo command. Find the line that reads copy "iso14651_t1_common". Change that to copy "iso14651_t1_common_edited" and save.
Thereafter, open iso14651_t1_common_edited and scroll down a bit until you see this line:
<U005F> IGNORE;IGNORE;IGNORE;<U005F> # 33 _
Change that to this:
<U005F> <RES-1>;IGNORE;IGNORE;<U005F> # 33 _
The last set of steps will involve getting your Linux setup to recognize this new (modified) locale. Open /etc/locale.gen in a text editor with a sudo command and add a line that reads en_US_edited.UTF-8 UTF-8 somewhere as a new line. Save that and run the following commands to finalize what you did.
sudo locale-gen
validlocale en_US_edited.UTF-8
sudo localectl set-locale LANG=en_US_edited.utf8
Finally, reboot the system (not just logout) for the changes to take effect.
Disqus is great for comments/feedback but I had no idea it came with these gaudy ads.