Create your Academic Website in Jekyll and Host it on Github

- Octojekyll.
I recently moved my academic website from a shared hosting plan through a provider to Github. I also changed the engine from Wordpress’ content managing system to Jekyll, an open-source, blog-aware, static-site generator that is powered by Ruby.
There are multiple reasons for the move, some worth sharing. One, Wordpress is effectively bloatware. It may be useful if you’re serious about a content managing system with multiple users or subscribers, but it just makes too many time-consuming database queries for what I need it to do. Two, I’ve had some poor experiences with hosting plans. My previous one had terrible customer service. The one to which I switched this summer has better customer service and is quite a bargain (all things considered), but the servers are surprisingly slow. Servers will also time out routinely. This compounds Wordpress’ software bloat.
Finally, my Wordpress website was one of over 100,000 hit by that “SoakSoak” bug last November. It took down all my files. This happened over Thanksgiving break when I was at my parents for the holidays and unable to do anything about it and close to final exam time for my classes. My students lost easy access to the class notes I post, which required me to take time to redistribute those through Blackboard.
I’ve been wanting to move toward something that is secure, fast, and requires as little hand-coding of HTML as possible. I believe I found it with Jekyll as hosted on Github. I recommend you do the same, especially if you’re a graduate student who is curious about creating your own professional website.
Advantages of Github and Jekyll
While there are a plethora of website hosting services for people in my position (i.e. graduate students or young faculty), I think a Jekyll site hosted on Github has multiple advantages over other options.
- It’s free. Graduate students should appreciate this. A typical hosting plan costs between $45-$60, depending on the type of deal and the commitment the consumer makes. Public repositories on Github are free. Jekyll is free and open-source.
- It’s portable. Github accounts will stay the same no matter your university affiliation. You’ll lose your university account (if you have one) when you leave.
- It’s not going anywhere. Universities are beginning to curtail some web services. For example, the University of Illinois dropped its “NetFiles” service for the one academic year in which I was there. Illinois replaced it with its “publish” service (i.e. Wordpress as content managing system). However, its installations of Wordpress seem to lack critical security updates and CITES appears to play a pretty aggressive gatekeeping role on functionality and aesthetics.
- It’s fast, but flexible. Underneath the hood, Jekyll bears some resemblance to content managing systems that allow users to create multiple pages in markup and output them on the web. However, Jekyll is a static-site generator. There are no time-consuming database queries. Github’s servers are fantastic as well.
- Github URLs just “look better”. Finally, I think Github urls (i.e.
username.github.io) just look nicer than other options.yourusername.wordpress.comlooks like the subdomain of a blog, not an academic website.sites.google.com/site/yourusernameis clunky. Students and colleagues will not remember it as easily. Plus, my hunch is Github doesn’t nearly have as many user accounts as Wordpress or Google. In other words, I gotsvmillerat Github when I joined on June 1, 2013. I highly doubt I could score something similar at Wordpress or Google. I would end up settling for something likeprofsvmillerclemson, which does not look nearly as nice. Plus, you can always graft on your own particular domain name to your Jekyll site on Github if you want.
Get Started in Jekyll
I will defer the discussion on Github until later in this guide. Until then, go to Github and register for an account if you have not done so already.
While what follows is not strictly mandatory, I strongly encourage installing Jekyll locally on your computer. My understanding is that Windows users are unable to do the process I outline next (though see here), so I assume the reader is using either a Mac or a Linux operating system.
- Install Xcode (Mac users). Every guide I’ve seen for Mac users reiterates the need to install Xcode through the App Store. Do that if you have not already.
- Install Jekyll through Ruby. The best way to install Jekyll (either in Mac or, from my experience, Linux) is through RubyGems. Ruby is an easy installation on a Linux distribution like Ubuntu. Mac, if I understand correctly, comes with Ruby pre-packaged and ready to go. Mac users can choose to update (and apparently should?) from their version (which is likely 1.8.7), though I don’t think I did this when I installed Jekyll on my Macbook. Enter the following command when you’re ready.
gem install jekyll
- Create a directory to house your website. Call it whatever you want, but make it intuitive. I called mine
svmiller.github.ioto make it intuitive since that’s going to be the URL on Github to follow. I also put mine on Dropbox because I work between my Ubuntu desktop at home and my Macbook at work and away. - Have Jekyll make your basic site for you In a terminal window, change the directory to what will be your future website and enter
jekyll new .. Here’s an example for a reproducible template I’m building (based off my own):
steve@stevebuntu:~$ cd Dropbox/miscelanea/jekyll-template
steve@stevebuntu:~/Dropbox/miscelanea/jekyll-template$ jekyll new .
Configuration file: none
            Source: /home/steve/Dropbox/miscelanea/jekyll-template
       Destination: /home/steve/Dropbox/miscelanea/jekyll-template/_site
      Generating...
                    done.
 Auto-regeneration: disabled. Use --watch to enable.
…and your basic site template is already built.
- Look at your basic outline of a site. The template you get should look like this. If you want to see it for yourself, enter
jekyll serve -winto your terminal and open a browser window tohttp://localhost:4000. PressCtrl-Cin the terminal window when you are done.
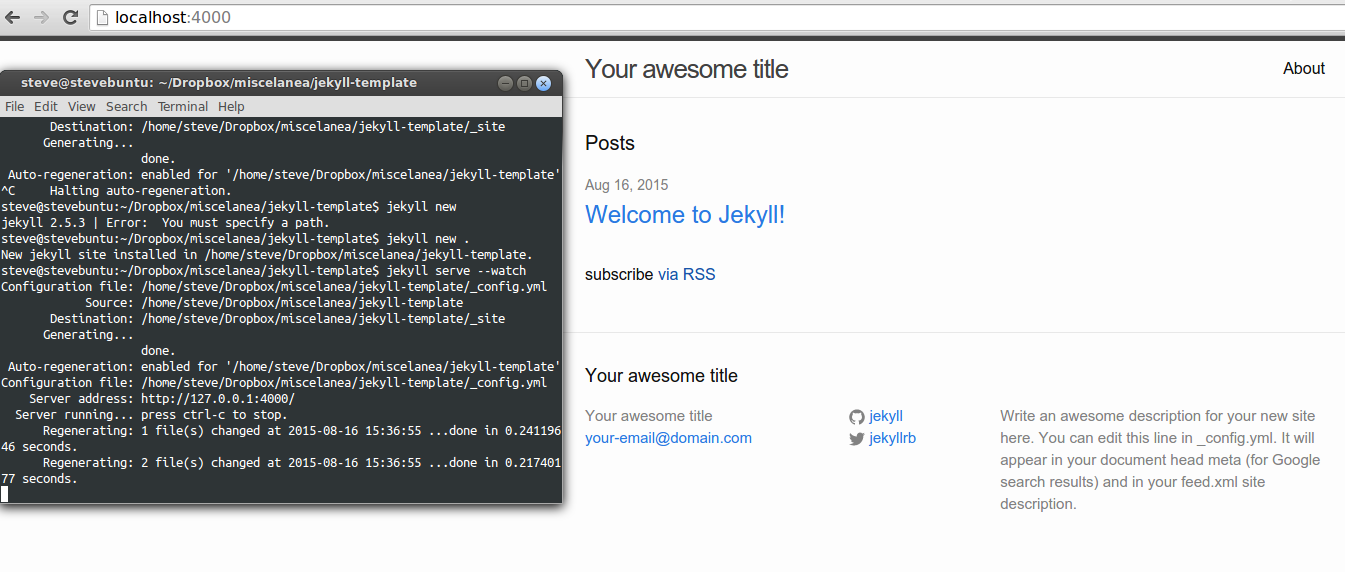
- A default Jekyll site (with accompanying terminal commands).
While a local installation of Jekyll is not strictly necessary for creating a Jekyll-powered site that is hosted on Github, I think of it as advisable. In short, a local Jekyll installation allows the user to operate a ``development server’’ (i.e. jekyll serve -w) that will allow the user to preview what the generated site will look like (i.e. at http://localhost:4000). This is incredibly useful for debugging. The terminal window will advise the user when s/he has screwed something up in code and where, exactly, the error is. Take advantage of this, especially if you are unfamiliar with Ruby (as I was when I started this project a few days ago).
Customize Your Jekyll Site
There are a myriad of customization options for Jekyll. I would be misleading the reader if I pretended to have mastered them all. That said, here are a couple important things to do.
Edit _config.yml
You should find a file called _config.yml in your main website directory. Open that with a text editor of your choice and have a look. There are a wealth of customization options you can do here, but I kept mine fairly simple. Edit your site name, site description, e-mail, and other default fields included in that file.
While this is optional, consider changing the permalink structure for blog posts (if you intend to have one). By default, Jekyll will include the post category in the permalink, which I think is kind of silly. I added the following lines to my _config.yml file to make my blog posts more like Wordpress and ensure compatability with my old Wordpress posts.
# Other options
permalink: blog/:year/:month/:title
When you’re done, save and move to the next item on the agenda.
Data-driven Navigation Menu
Think what you want your navigation menu on your site to look like if you intend to keep the basic template Jekyll gave you (or if you inted to use mine). Here’s the basic structure underpinning my navigation menu.
About
Blog
CV
For Students
 - Page 1
 - Page 2
Research
Teaching
 - Class 1
 - Class 2
 - Class 3
 - Class 4
Miscellany
 - Page 1
 - Page 2
 - Page 3
In other words, my navigation menu has seven items. Three of these seven items have submenus underneath that.
Once I outlined what I want my navigation menu to resemble, I created a folder in my main site directory and titled it _data. Therein, I created a new YAML document that I saved as menu.yml. Here are its contents.
- title: "About"
  href: "/about/"

- title: "Blog"
  href: "/blog/"

- title: "CV"
  href: "/cv/"

- title: "For Students"
  href: "/for-students/"
  subcategories:
    - subtitle: "Letters of Recommendation"
      subhref: "/for-students/letters-of-recommendation/"
    - subtitle: "Pi Sigma Alpha"
      subhref: "/for-students/pi-sigma-alpha/"

- title: "Research"
  href: "/research/"

- title: "Teaching"
  href: "/teaching/"
  subcategories:
    - subtitle: "POSC 1020 – Introduction to International Relations"
      subhref: "/teaching/posc-1020-introduction-to-international-relations/"
    - subtitle: "POSC 3410 – Quantitative Methods in Political Science"
      subhref: "/teaching/posc-3410-quantitative-methods-in-political-science/"
    - subtitle: "POSC 3610 – International Politics in Crisis"
      subhref: "/teaching/posc-3610-international-politics-in-crisis/"
    - subtitle: "POSC 3630 – United States Foreign Policy"
      subhref: "/teaching/posc-3630-united-states-foreign-policy/"

- title: "Miscellany"
  href: "/miscellany/"
  subcategories:
    - subtitle: "Clean USAID Greenbook Data"
      subhref: "/miscellany/clean-usaid-greenbook-data/"
    - subtitle: "Journal of Peace Research *.bst File"
      subhref: "/miscellany/journal-of-peace-research-bst-file/"
    - subtitle: "My Custom Beamer Style"
      subhref: "/miscellany/my-custom-clemson-themed-beamer-style/"
Be careful with YAML. YAML is finicky about spaces. Use this website to check if your YAML code is valid.
Next, venture to your _includes directory and create a blank document and save it as nav.html. Enter the following code into it and save.
<ul class="menu">
{% for steve in site.data.menu %}
    {% if steve.subcategories != null %}
    <li><a href="{{ steve.href }}" class="page-link">{{ steve.title }}</a>
    <ul class="sub-menu">
    {% for subcategory in steve.subcategories %}
    <li><a href="{{ subcategory.subhref }}">{{ subcategory.subtitle }}</a></li>
    {% endfor %}
    </ul>
    {% else %}
     <li><a href="{{ steve.href }}" class="page-link">{{ steve.title }}</a>
    {% endif %}
    </li>
    {% endfor %}
    </ul>
You can take out my name if you want and replace it with your own. I basically ganked this code anyway.
Finally, find your header.html file in the same _includes directory. Locate this section of your code…
        {% for page in site.pages %}
          {% if page.title %}
          <a class="page-link" href="{{ page.url | prepend: site.baseurl }}">{{ page.title }}</a>
          {% endif %}
        {% endfor %}
…and replace it with this and save:
{% include nav.html %}Go to http://localhost:4000 and check to see if your menu was generated. It should have, even if it’s a bit on the ugly side for the moment. You can fix that with CSS code if you like. Take a look at my _header.scss file from my _sass directory. You can see it on my Github.
Create Some Pages
I assume some familiarity with Markdown in this section. If you don’t know about Markdown, look up any number of cheatsheets. Markdown is awesome.
Let’s start with a basic “about me” page. Create a new document in your site directory and save it as about.md. Enter something like this and save.
---
layout: page
title: About Me
permalink: /about/
---

Hi Mom!

Lorem ipsum dolor sit amet, consectetur adipiscing elit. Sed in condimentum urna. Integer imperdiet enim et diam pulvinar, eget commodo tortor aliquam. Quisque dignissim, lorem ac viverra accumsan, odio nibh posuere velit, eu euismod nulla diam at lacus. Suspendisse id facilisis felis, sed pharetra ante. Phasellus at diam massa. Vestibulum placerat erat nunc, nec blandit dui mollis a. Mauris malesuada nibh in ligula aliquet porta. Sed vitae tortor sed urna sollicitudin porttitor. Nam fermentum fermentum enim, eu faucibus eros ultricies id. Nulla facilisi. Sed orci urna, porttitor ac arcu et, fringilla auctor lacus. Sed non ante in tortor cursus pulvinar. Integer euismod tempus nisl, vel luctus enim facilisis vitae.
If you already have an about.md as part of your jekyll build, observe its contents. Either way, look at how the permalink maps to what we specified in a previous section about data-driven navigation.
Create as many of these as you need.
Customize your CSS (or “Fork” my Site or Someone Else’s)
There are countless other things to mention in terms of cutomization. There’s a fair bit of CSS editing involved, for which I don’t have time to delve into details. If you wish, you can save some time by forking my template to your own username.github.io repository on your Github account.
If you wish, you can also consider some other themes.
Get Started in Github
Once you created your Github account and visit your profile, you should see something like this.
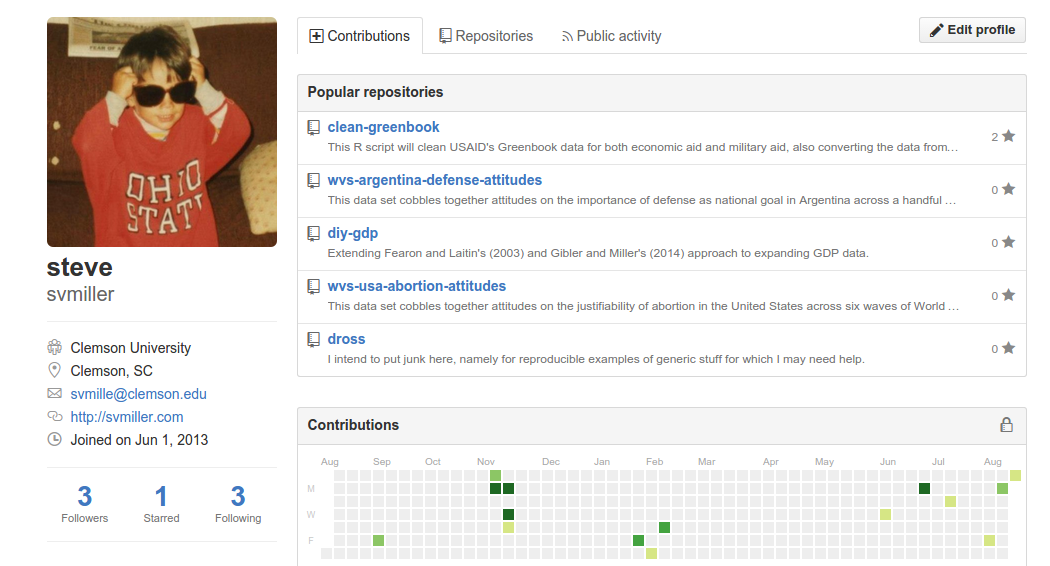
- My Github page
Click “Repositories” and then click the green button for “New”. Under “Repository name”, enter yourusername.github.io where “yourusername” coincides with your username on Github. Enter a brief description if you’d like and press save. For now, you don’t need to create anything else.
Next, go to your Jekyll directory on your hard drive and check if you have a .gitignore file. You should (even if it may momentarily be hidden). If you don’t have one, create one and enter the following two lines it.
_site
.sass-cache
This tells Github to ignore the _site directory and .sass-cache. You’ll never want to edit these. You’ll especially want to leave the _site directory alone. The _site directory is the destination directory for your entire website. Jekyll uses the raw markdown files in the “main” directory of your Jekyll installation to render your website in the _site directory. Likewise, Github’s servers will do the same.
Open a terminal window and change the directory to the one containing your website. Enter the following commands. Change yourusername as necessary.
git init
git add .
git commit -m "first commit"
git remote add origin https://github.com/yourusername/yourusername.github.io.git
git push -u origin master
Thereafter, you should be prompted in the terminal window to give your username and password. Once that’s done uploading, open a tab in your browser to yourusername.github.io. You should be done. Subsequent updates can be done as follows.
git add .
git commit -m "message accompanying my updates"
git push -u origin masterDisqus is great for comments/feedback but I had no idea it came with these gaudy ads.